deepeye.hu
Astronomical Drawings of Peter Kiss
Astronomical Drawings of Peter Kiss


If you have ever used your telescope out at night then you know that you need light to exchange the eyepieces, to see the starmap, to manage all sorts of gadgets or to be able to draw. But if there is too much light then it is not good because the frame being exposed can be thrown out or your dark adaptation will get ruined. Different lamps might be suitable for different purposes. A not too bright red headlamp might be good for photography (both hands are free). But for drawing (I am thinking about deep-sky) a headlamp is unfortunatly too bright. A headlamp is too far from the paper one is drawing on, and the light is scattered all around. Also it is not the best to take a look into the eyepiece with a "bright" lamp on the head. It will not help to figure out how those faint spiral arms really are. And it's annoying if you always need to turn it on and off.

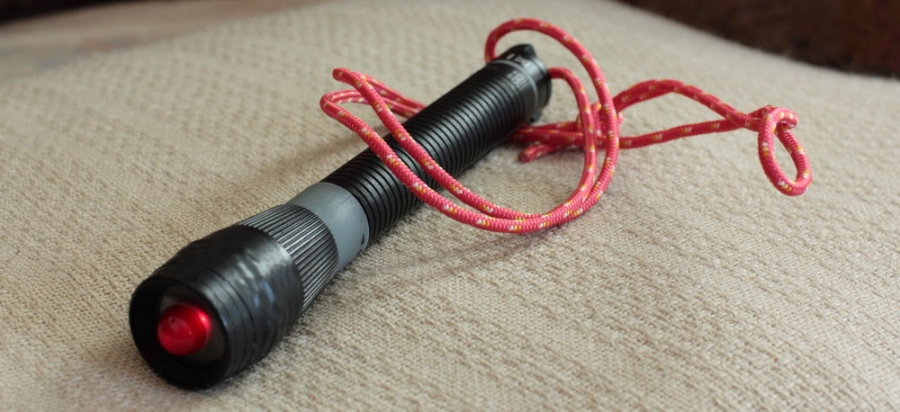
For many years I used sort-of usable lamps. Then I got fed up with that and I made a proper lamp for myself for deep-sky drawing. Usually even the slightest things have significance when drawing deep-sky. Sometimes very little things can make a huge difference, e.g. they can decide whether you see the spiral structure of a galaxy or you don't.

If you can't find such a lamp in the shop you can make it yourself. There is not many things needed. The most critical and most expensive part is to find a good lamp body. I use one that works with 2 AA batteries. If you found a lamp that seems to be right, there is a good chance that the light it provides is not ideal (faint red light). So here comes a little bit of DIY for which you will need some electronic parts worth about 0.5 $ and several hours of patience.
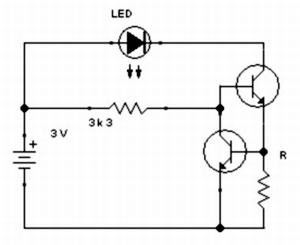
By changing the original light source for a big red LED you can tick most criteria in the list above. But the most important thing is still missing - the constant faint light. If you make the little electric circuit depicted in the figure and put it into the lamp body then you solved the regulation of the LED's brightness. If the batteries' voltage fluctuates a little bit then the LED's light will change only by unnoticable amounts. The key part of the electric circuit is the resistor R. Its resistance determines the brightness of the LED. For me R = 120 Ohm is ideal but you can experiment to find what is best for you. Of course a variable resistor can be used as well. This way the brightness of the lamp can be changed in the field (my lamp is fixed).
These few resistors and transistors can be fit into a tiny place. After checking that everything is OK and the LED's brightness is perfect, you can pour some epoxy or silicone onto the circuit. This way you solve weather sealing and it won't break if you simply drop the lamp. Now you only need to go under the sky and start drawing. You can forget all the nuisances caused by the lamp and concentrate 100% on the deep-sky object.